
Hello, I am Duck, the administrator of this site.
This time, I am doing a temporary assembly of the MG Strike Freedom that I bought at the end of the year 2022.
It was a very popular kit at the time of its release, and I happened to see it at a store, so I bought it. The assembly process was smooth and easy, even though there are quite a lot of parts. The gold runners are undergated, so if you carefully cut them off with nippers, you won’t notice them after the cut. As you would expect from the MGEX series, the parts have a special feel to them.
This time, I will only introduce the temporary assembly process, but I will also introduce the painting process in the future.


What’s inside?


There are three types of gold runners, two plated ones and two G runners are molded gold. Parts of this runner may be painted.
Emotion manipulators are included. Several types of fixed hand parts are also included, so you can use whichever you like.


It includes a clear part beam shield, painted clear and blue to give the feel of a beam shield.
A stand is included but will not be used this time.


You can stand four paper stand runners, which are useful when assembling the help items, but it might be easier to assemble parts by parts if you can stand them up a little more.
temporary assembly


Start by labeling the runners with masking tape. This is especially effective for this MGEX Strike Freedom because there are so many runners that it is more efficient to work with them if you can see them at a glance.
Inner frame


The first step is to create the inner frame.
The combination of three types of gold parts gives it a pretty nice look.
Following the instructions, the first step is to create the inner frame. The G runner is molded color and not plated, so it looks dull and gold. This part should be painted. You may need to be prepared to disassemble all the G runner parts as they are used in quite a few parts.
Backpack


The MG Strike Freedom that I made about two years ago required joint erasing on many parts, such as the dragoon parts, but this time all the parts are molded in stepped molds, so it is easier to assemble after painting.


I did some gating, but it is very voluminous and hard to assemble.
When completed, the gold color that can be glimpsed is very nice.
Exterior


It is under-gated like the inner frame and backpack, so gating is fairly easy. Even so, some filing is necessary.


The exterior parts have molds carved on the back side, giving it an amazingly special kit feel.

Clear Parts


The clear parts used for the arms, shoulders, etc. I wanted to use them as they are, so after separating them from the runner, I used a fine file to polish them, mainly on the cut parts. I used Tamiya’s compound for finishing.
Separate from the runner (recommended to cut twice) → file #600 (so that the separated part can not be seen) → #1000 (to adjust the shape after applying water) →Finish by lightly applying #2000 (for finishing). →Polish with compound to complete.
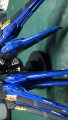
Rifle


The back part of the rifle opens and closes for the one held in the right hand, and the tip of the rifle for the left hand sticks in and merges with the rifle.

Both guns are telescopic, although not shown in the photo.
Temporary assembly complete


It took about 10 days to complete the temporary assembly.
It looks cool.
The number of parts was quite large. The paper stand that came with the kit was not enough, so I used the stand that I had been using for a long time.
The calf part is considerably larger than MG Strike Freedom which I made before, and the intimidating feeling has increased.
Most of the parts were undergated, so gate processing was a breeze.


This is a comparison with the MG Strike Freedom I made before.
The overall volume of the figure is much larger. The gold coloring of the joints and other parts stands out, as expected from the use of plated parts. Furthermore, the MG version looks simpler with more information on each part.
Summary and Future Work Plans
The gold used for the inner frame is quite cool, and I like the proportions of the metal build-like atmosphere. Most of the parts are undergated, which is effective for parts that cannot be processed such as plated parts. I am sure that Bandai’s kindness will be felt by those who are going to paint in the future.
We do not have any plans for detail enhancement. I am planning to paint it in a color close to the color of the setting. The gold plated parts will remain unpainted, and I will paint only the gold G runner, which looks a little cheap.
Since there are quite a few parts, I will paint the backpack, exterior, and inner frame in separate blocks.
Next, I will paint the backpack and rifle.
Thank you very much for watching until the end.
MGEX Strike Freedom has been on sale for about half a year now, but the amount sold on the web is still high… It seems that they ship every month, so it might be better to wait until you can find it in stores without being impatient yet. I’ll post the link in case you are interested.

コメント