MG Ver.Ka · Assembly, Surface Prep & Clean Airbrush Painting
A detailed look at a compact Master Grade: from test assembly and tricky joints to crisp color separation and the final display.

The MG Crossbone Gundam X1 Ver.Ka is a small mobile suit packed with surprisingly detailed engineering. For this build, I focused on careful preparation rather than major modifications: checking fit during a temporary assembly, refining visible surfaces, then applying consistent white, navy and accent colors.
This is a hands-on build record based on my own model and process photos. It covers what I checked before painting, the parts that demanded extra care, and how a clean, even finish brings out the Crossbone’s distinctive silhouette.
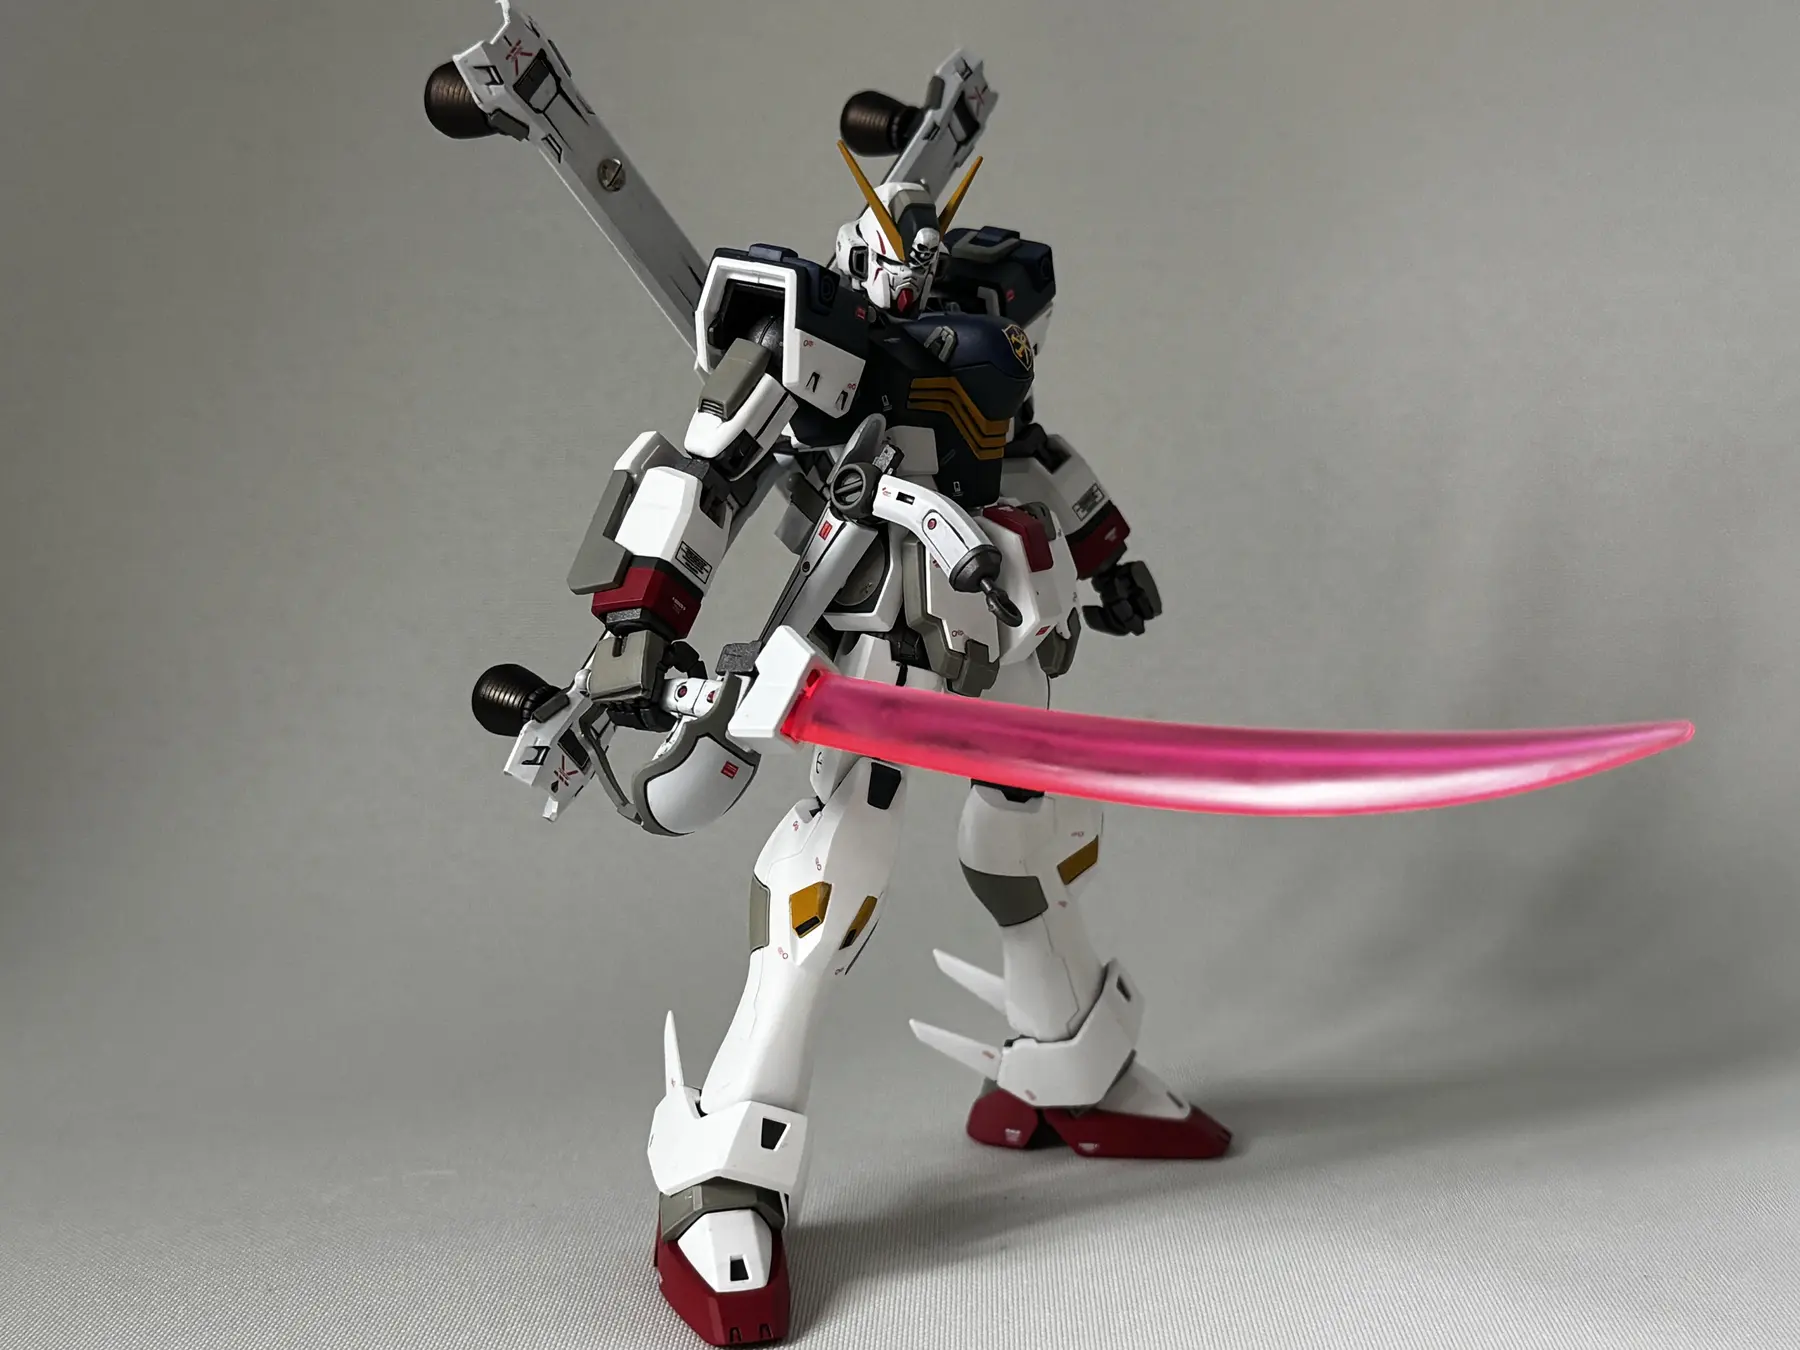
A clean, high-contrast Crossbone Gundam X1
Bright white armor carries most of the design, with darker navy sections around the torso and shoulders. Small red and yellow accents keep the familiar Crossbone color scheme recognizable without overwhelming the shape. Instead of adding extra armor details, I aimed for sharper surfaces and controlled color boundaries.


Test fitting before painting: what to watch for
Before committing to paint, I assembled the kit to inspect the overall proportions, joint resistance, weapon clearance and the sections that would be difficult to take apart later. This is a test assembly before painting (often called a dry fit in my Japanese build logs), not a completed unpainted build.


Small scale, detailed construction
Despite the Crossbone’s 15-meter-class fictional height, the model contains tightly packed armor, inner-frame and equipment parts. Similar-looking pieces can be easy to confuse, so check the part numbers and orientation in the instructions before forcing a connection.


The rear thruster structure also forms part of the Core Fighter arrangement. Understanding how the sections fit together makes later disassembly and final assembly more manageable.
Clean up the parts that matter visually
I didn’t try to sand every part equally. The focus was on visible nub marks, the outline of the feet, the leg armor and existing panel lines. Some seams belong to the armor design; removing all of them would create extra work and could soften useful details.


My approach: preserve sharp edges, remove defects that show on the finished kit, and test the fit again after any adjustment. This is one workable method, not a checklist that every builder must follow.
Solid-color painting for crisp, readable armor
For this build I used an even-coverage approach rather than deliberately leaving dark shading around every edge. In English, it is easier to describe the goal as a clean, even airbrush finish: build up thin coats until each surface reads consistently, then let the dark and bright armor colors provide the contrast.


Paints documented in this build
| Paint | Role in the color scheme |
|---|---|
| Mr. Color GX Cool White | Main white armor color. |
| Mr. Color Dark Sea Gray | Gray used to balance darker and mechanical areas. |
| Mr. Color Navy Blue | Strong contrast around the upper body. |
Red and yellow accents complete the overall scheme. I have not included an exact paint-thinner ratio, air pressure or color formulas here because those figures are not confirmed in the original build record. Inventing numbers would not make this guide more useful.
Sharp color boundaries, panel lines and markings
The white and navy color separation only looks clean when the borders are controlled. I masked smaller armor and weapon components individually and checked that the tape was seated against edges, especially on narrow surfaces.


The kit’s supplied markings observed during the build were dry transfers and marking stickers, not water-slide decals. The final model has small markings that add visual detail without hiding the white paintwork. Panel lining and careful final assembly help complete the result.
The original photos and notes do not establish a specific clear-coat type or application setting, so those details are intentionally left unspecified.
Is the MG Crossbone Gundam X1 Ver.Ka worth the effort?
Its compact scale does not make this a throwaway build. The detailed construction, Core Fighter arrangement, weapon fit and fabric-like ABC mantle reward a careful test assembly. Some smaller joints deserve patience, especially if the model will be disassembled for painting.
For my finished model, the biggest improvement came from the basics: smooth white panels, preserved panel lines and clean masking against navy, red and yellow. The silhouette remains unmistakable, while the X-shaped rear assembly gives the model visual weight from behind.


Completed build gallery


What I’d take into the next build
This Crossbone X1 is a reminder that a full repaint doesn’t have to mean a major conversion. A deliberate test assembly, targeted cleanup and controlled airbrush coverage can make an already detailed MG feel sharper and more coherent.
Original Japanese build journal: MG Crossbone Gundam X1 Ver.Ka (Japanese)
Technique references: Even-color painting guide (Japanese) · Surface preparation guide (Japanese)
More documented builds: Hoss’s Gunpla Works
