
Hello, I’m the caretaker.
This time it’s painting. I found a masking for camouflage painting on Amazon, so I tried it. The pattern is my first challenge, so I’m groping.


Paint used


green
RLM71 dark green
Red
Gundam Color UG04 MS Red
yellow
C58 yellow-orange
Inner frame
Gundam Color Spray MS Gray Zeon
Painting

The entire paint is solid. Easy painting that can be reproduced even with a can spray. Eventually, we plan to finish the whole with a matte feel.
Camouflage painting


It is a masking sheet I bought at Amazon. I bought several colors of paint that could be used together. Since this is my first attempt at camouflage painting, I recorded the process in detail.
Paint used
Sandy Brown → Dark Earth → Sale Color

I was planning to have two colors of camouflage, but I changed the schedule because three colors are cooler.

As usual, I will apply camouflage masking from Surfacer Gray 1200 to Sandy Brown with all paint.
I will stick it in a well-balanced manner so that there is no unevenness.
Since the parts are curved, I’m careful not to make creases.

It is the second color painting.
I will apply the darkest dark earth.

I finished painting the dark earth.
I’d like to remove the masking and see what happens, but let’s get rid of it.

This is the second masking.
Since the dark earth painted in the second color is a very impressive color, I want to reduce the painting area, so I will apply the second masking with the image that protrudes from the first masking.

This is the second painting. I will paint the sale color. For the second painting, apply it little by little so that the paint does not flow through the gaps in the masking.

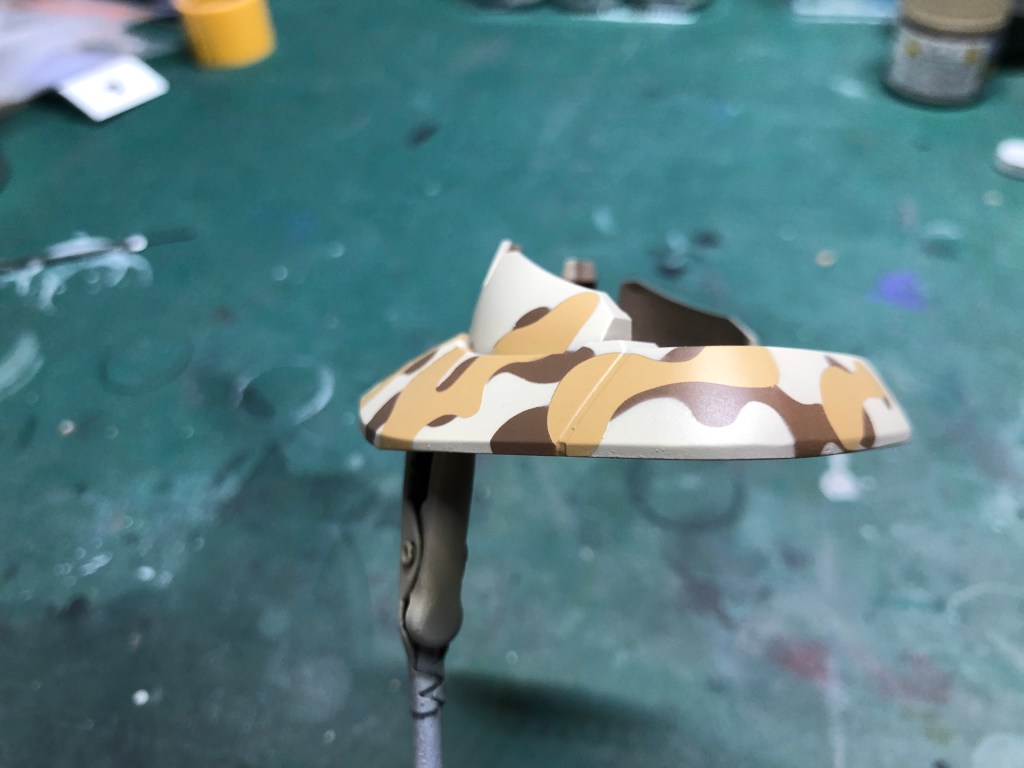
The third sale color has been painted. It has become a desert-like color.
After leaving it for a while, I will remove the masking.

Remove the masking.
It is difficult to remove it because it is pasted in a considerable amount.
I finished peeling it off.
Isn’t it a pretty good feeling!
The camouflage painting is completed by blowing a matte clear.


The desert camouflage is completed. The sense of accomplishment after removing the masking is irresistible. It feels good。

The painting is almost completed.
Since it is a process of painting → masking → painting → masking → painting, it takes a lot of time and effort, but each work itself is not difficult, so it is possible to paint with a little patience.
It might have been interesting to have a camouflage pattern with a slightly finer pattern.
Next time I would like to try green camouflage.
The type is a little different, but I will put the link of the masking sheet for the camouflage pattern found on Amazon.
Decal


I put a little decal on it. The mark softer improves the adhesion with the parts.
Top coat

I will not do weathering this time, so I will finish with a top coat.
Completion


This is the end.
It was my first camouflage painting, but it was a satisfying finish. I found that camouflage can be made relatively easily by using camouflage masking. I would like to try Z’Gok and Zaku.
The other parts are solid, so it finished smoothly. I think it can be reproduced with a can spray including camouflage. Since masking is repeated, there will be gaps, so it may be necessary to devise a spraying method.
This completes the entire process. It feels unsatisfactory not to do weathering, but this time it will be completed in this state.
Thank you for watching until the end.


コメント